The only problem using System Image is that you cannot choose individual items to restore as you perform the system restored using this image. All of your current settings, programs, and files will be replaced with the contents of the system image. Also, by default, only your drive containing Windows will be included in this system image, but you can choose to include as many drives connected to your computer. One more important thing, if you had made a system image backup for your PC, then it won’t work on another PC as it’s specifically designed to work for your PC. Similarly, a system image created with someone else PC won’t work on your PC. There are many other 3rd party programs that you can use to create a system image backup of your PC, but you can always rely on Windows built-in feature to work perfectly. So let’s see How to Create a Windows System Image on your PC with the below-listed steps.
How to create a System Image Backup in Windows 10
- Press Windows Key + X then select Control Panel.
How to create a System Image Backup in Windows 10 Restoring the computer from a system image
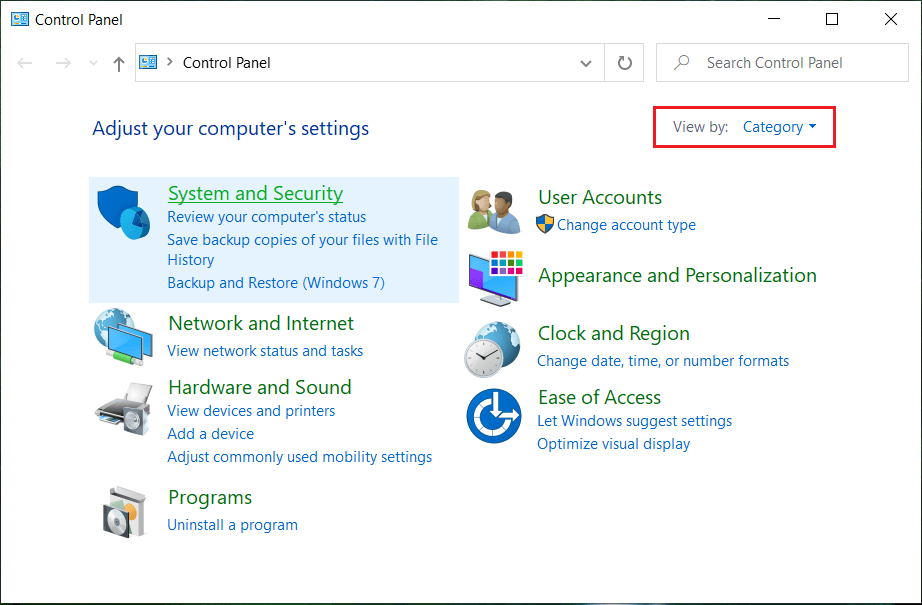
Click on System and Security. (Make sure Category is selected under View by dropdown)
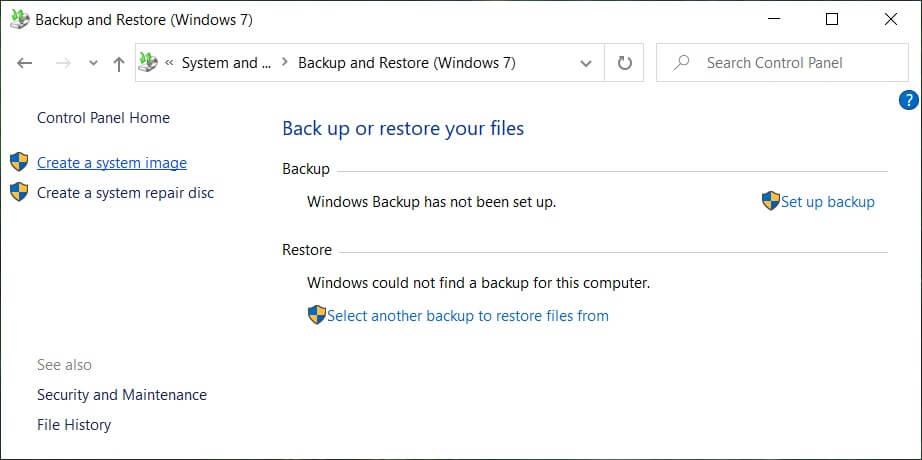
Now click on Backup and Restore (Windows 7) in the list.
Once inside Backup and Restore click on Create a system image from the left window pane.
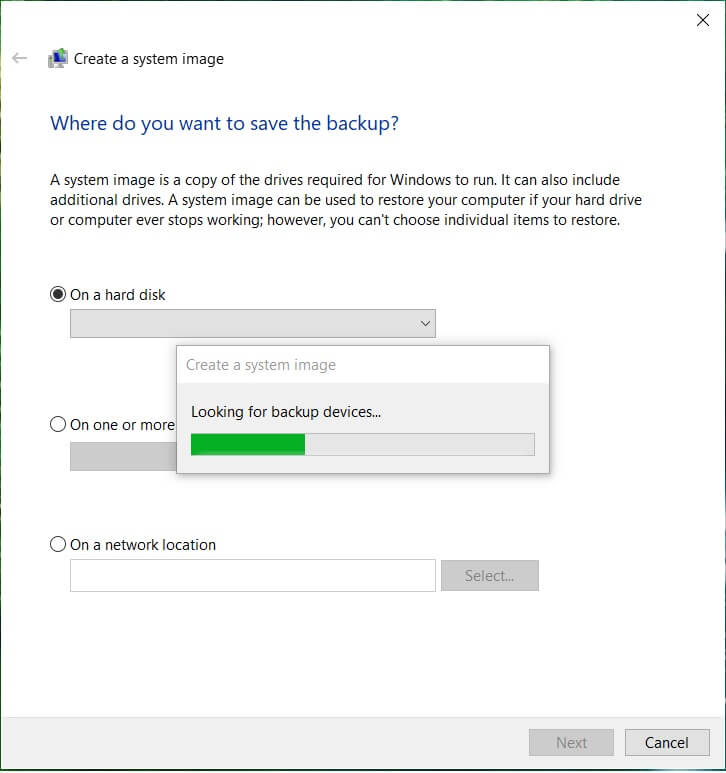
Wait for a few minutes as the tool will scan your system for external drives.
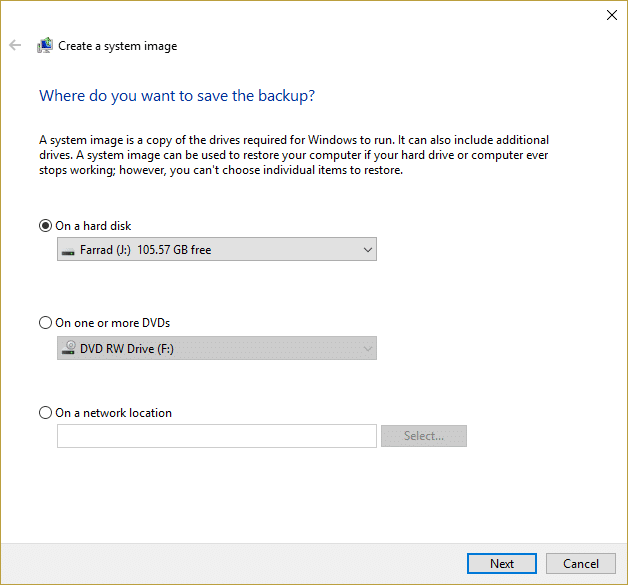
Select where you want to save the system image such as DVD or an external hard disk and click Next.
By default the tool will only backup your Windows installation drive such as C: but you can choose to include other drives but keep in mind it will add to the size of the final image
Note: If you want to include other drives you could run System Image backup separately for each drive as this is an approach we like to follow. 8. Click Next, and you will see the final image size and if everything seems alright, click on the Start Backup button.
- You will see a progress bar as the tool creates the system image.
10.Wait for the process to finish as it can take few hours depending on the size you’re backing up. The above will create a System Image Backup in Windows 10 on your external hard disk, and you could use it restore your PC from this system image.
Restoring the computer from a system image
Press Windows Key + I to open Settings then click Update & Security.
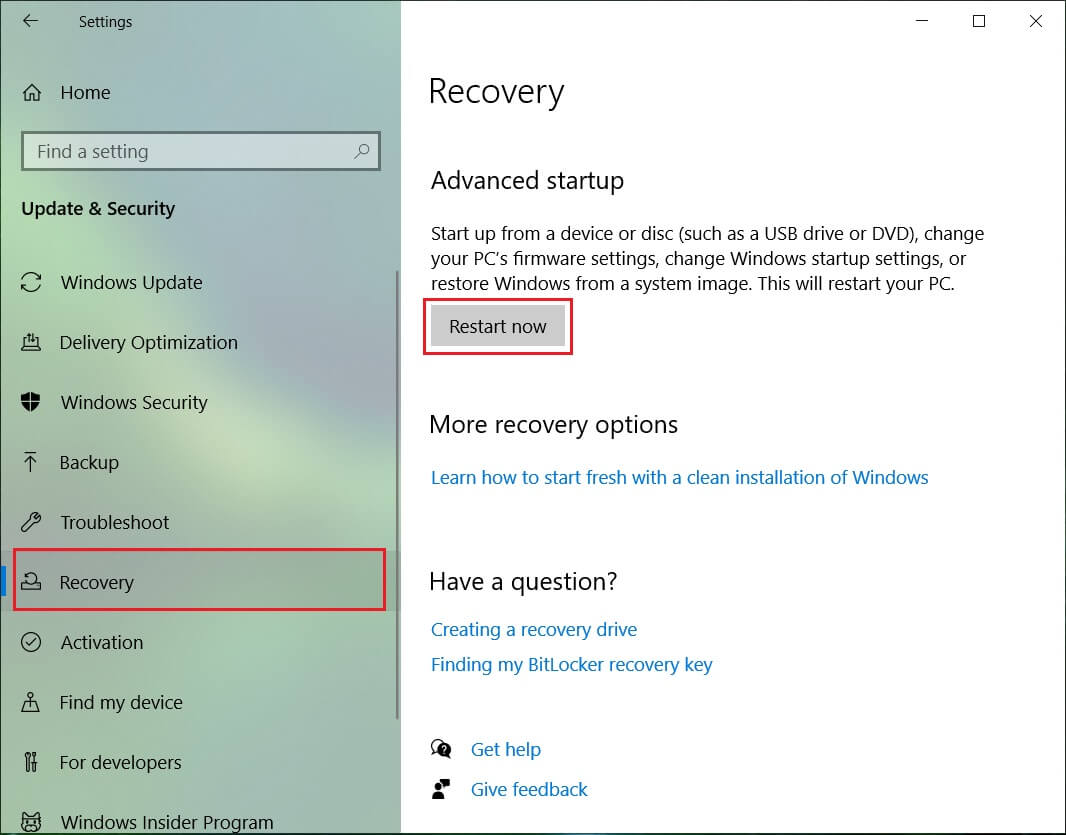
From the left-hand menu, select Recovery and click on Restart Now under Advanced Startup.
If you can’t access your system then boot from Windows disc to restore your PC using this System Image.
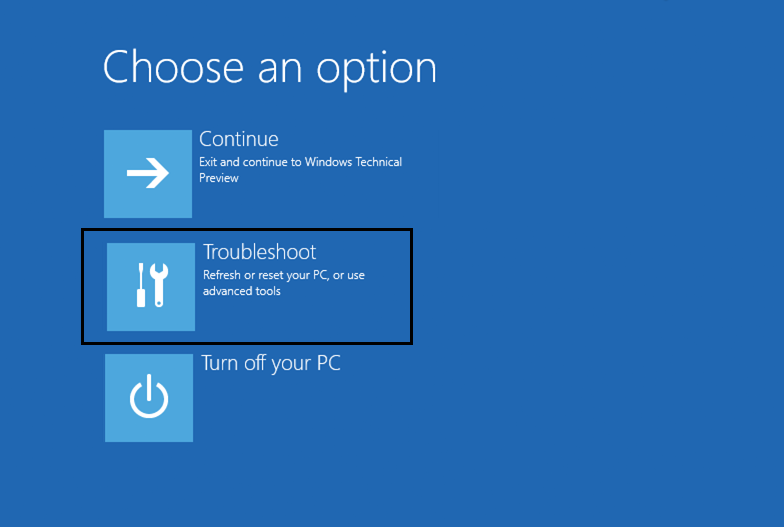
Now, from Choose an option screen, click on Troubleshoot.
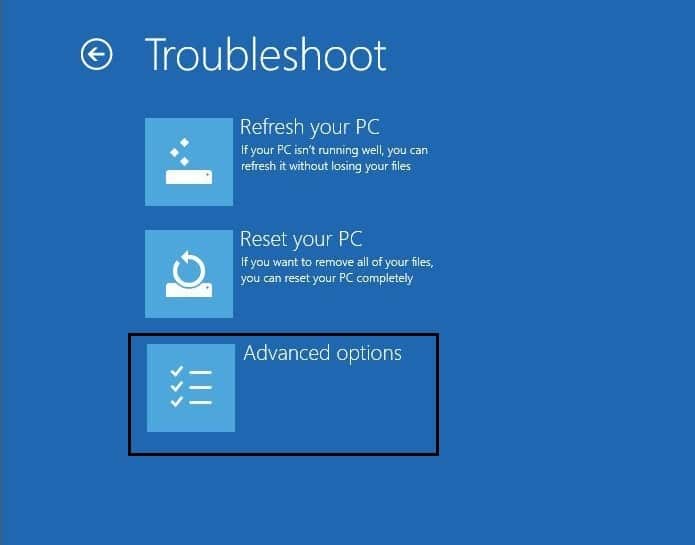
Click Advanced options on Troubleshoot screen.
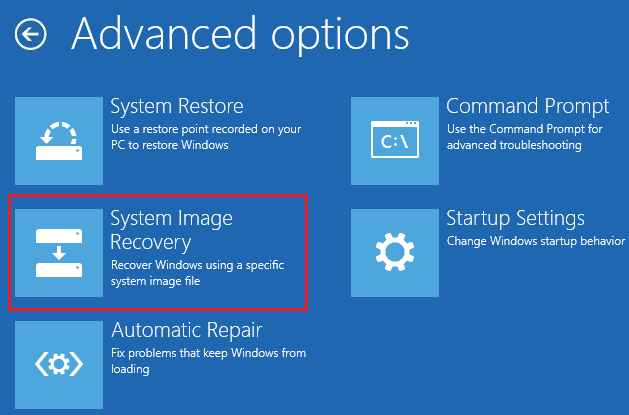
Select System Image Recovery from the list of options.
Select your user account and type in your outlook password to continue.
Your system will reboot and prepare for recovery mode.
This will open System Image Recovery Console, select cancel if you are present with a pop up saying Windows cannot find a system image on this computer.
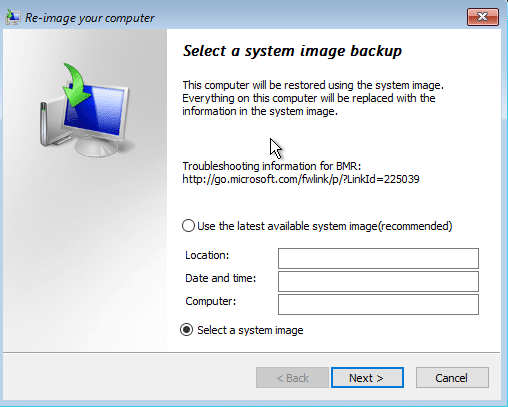
Now checkmark Select a system image backup and click Next.
Insert your DVD or external Hard disk which contains the system image, and the tool will automatically detect your system image then click Next.
Now click Finish then Yes (a pop-up window will appear) to continue and wait for the system to recover your PC using this System image.
Wait while the restoration takes place.
Recommended:
3 ways to find Windows Product Key How to Export Drivers Using PowerShell Fix Windows Stuck on Splash Screen 7 ways to fix Cortana can’t hear me
That’s it you have successfully learned How to create a System Image Backup in Windows 10 if you still have any questions regarding this guide then feel free to ask them in the comment’s section.




![]()
